Using the Site
General Tips
-
Orange links and buttons denote teacher-only functionality. Besides those orange controls, most pages on the site work exactly the same way for you and your students.
-
Check the ••• menu attached to content on the site for shortcuts related to that content.
-
Permalink pages (accessed via the ••• menu) also include admin tools like edit and moderate
Home
This is the landing page for your simulation.
Up Next
Up Next guides students through your simulation by presenting their available activities and other relevant notifications. The answer to "what do I do now?" is usually found here.
As a teacher, you'll also see prompts in Up Next when your action is required to move the simulation forward, e.g., when a student uploads a moderated submission or attempts an action.
Submit New
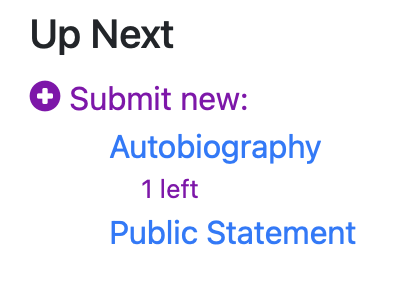
The Submit New menu within Up Next shows activities that are currently available to the logged in user, along with information like the cost of the activity and how many the student needs to submit.
This menu will update live as you create new activities and as students complete their assigned work.
If there's more to do than the menu can display, students can click a "more" link to view all of their options.
Pages
Besides the Up Next panel, the Home Page shows a preview of each of your site's pages with 3 - 5 of the most recent submissions visible for each page. By scanning the home page, students can rapidly gain a sense of what's changed in your simulation.
You'll see two types of pages here:
- Pages you create (see below)
- Built-in pages for certain activities
- The Actions page displays every action attempt and outcome
- The Polls page displays live poll results and published results from completed polls
Click any page's preview to visit the full page.
Create and Edit Pages
Create a new page by clicking the + Page button, or edit an existing one by clicking the Edit button in the footer of its preview block.
Page Settings
Name
Name your page anything you'd like.
Theme
A page's theme design applies to the page itself and as a frame around content from that page when its displayed elsewhere on the site (e.g., the Dossier).
Page frames help establish a sense of place for all the content in your simulation.
Built-in Themes
Choose our built in RNN theme for a newsy look, or the Social Network theme to simulate social media.
Custom Themes
Design your own page, with custom colors and images. If you upload a Header image, you can choose whether to show the page name in the header or just the image. This is useful if you have a logo for your page that includes its name.
Visibility
Choose who can see the content on your page from the following options:
-
Everyone
-
Teammates*
-
Submitters*
-
Some teams and roles
You can add additional teams and roles to any of the restrictive visibility settings. For instance, you could set a page to "Teammates" but give a specific team or role the ability to see all of the team's content on that page, not just their own.

Visibility settings apply to the page itself and to its content elsewhere on the site (e.g., on the Dossier).
Page Activities
Once you've created a page, you'll be prompted to add activities. You can also add or remove activities when you edit a page.
-
click the + button to add an activity to a page. You can create a new activity or move an existing one.
-
click Move... to remove an activity from the page you're editing
You can also create and edit activities, and their page assignments, on the Activities page in the Tools menu.
Dossier
Everything your students submit to the site appears in the Dossier, organized by Team and Persona and filterable by Activity.
Each team and persona page includes:
- everything the individual or team has submitted to the site
- if the individual or team has a bank account, their bank balance
Persona pages also include individuals' achievement point totals and any badges that they've earned.
When visiting others' Dossier pages, students can only see activity content from pages that they have access to and "Dossier Only" content with a visibility setting that includes them.
Managing Teams on the Dossier
You can create, edit, and delete teams from the Dossier.
- To create a team, click the + New Team button at the top of the page.
- To change the name of a team, navigate to that team's Dossier tab and click the Change Team Name button.
- To delete a team, remove all of the students from that team (see below), navigate to that team's Dossier tab, and then click the Delete prompt.
To add or remove students from a team, click the Edit button on the Students page.
- rename the Dossier (e.g., "Cities" in a competition to host the Olympics)
- assign map locations to each team that will appear at the top of their Dossier page
Profile
The Profile link in the menubar is a shortcut to the current user's Dossier page.
Messages
Use Messages to host real-time chat between characters in your simulation.
To chat with someone, students invite them to a Thread in Messages. Students can create one-to-one or group threads, and teachers can always see whats going in student threads in real-time.
The Messages menu will light up in purple when you have new Messages to read.
Setup
When you first visit the Messages page, you'll be prompted to set up the feature.
- Click the orange Settings button to get started
- Review and modify the settings to your liking
- Toggle the Closed switch at the top of the page to Open when you're ready for students to send messages.
Settings
Messages Settings determine who can start a new thread, who they can invite to those threads, and whether replies are allowed.
You can also toggle the Messages functionality on and off here.
To edit Settings, click the orange Settings button at the top of the Messages page.
Available settings:
Who can start a thread? Decide who can initiate conversations (threads) with others.
Who Can Be Invited To Join A Thread? Beyond limiting who can start a conversation, you can also set limits on who can be invited to join. The options are Anyone, Thread Creator's Teammates, and Teachers.
Allow Replies Defaults to Yes. Use this setting to allow thread creators to broadcast messages one-way. Invitees will be able to read but not respond.
Create Threads
You and your students can chat with others by creating a Thread with them. Students can create a new Thread with anyone you allow them to in Settings.
To create a Thread:
- Click New Thread at the top of the Messages page
- Choose other people to add to the thread. You can filter by Team and Role.
- Click Create Thread.
Members of a Thread can chat with each other whenever Messages are open.
View All Threads
Teachers can watch students chat in real time across all their threads by clicking View All Threads at the top of the Messages page.
You can drop in to any conversation here by clicking the "Join this thread" button. When you do so, you'll be added as a member of the thread.
Advanced: Create Additional Messages Activities
Behind the scenes, Messages Settings are powered by a built-in Messages activity. Like any activity type, you can create more Messages activities to give different groups of students different abilities.
For example, if you're running a diplomacy simulation where each student is on a team representing a different nation, you might allow students to start threads with other representatives on their team, but not members of other nations. Then, you could create a Diplomat role and allow diplomats to start threads with anyone they'd like. To accomplish this:
- In Messages settings, choose the following options:
- Who can start a thread? Everyone
- Who can be invited to join a thread? The thread creator's teammates
- If you haven't already, create a "Diplomat" role and assign it to your Diplomats
- Go to the Activities page, or click the Activities link at the bottom of the Messages Settings page, and create a second Messages activity for the diplomats with the following settings:
- Who can start a thread? Diplomats on any team
- Who can be invited to join a thread? Anyone
Tools
Tools is a teacher-only menu with everything you need to manage your simulation.
Overview
This page has two sections: Everything that's happened and Action required. You'll always see everything that's happened in your simulation in reverse chronological order. Any items awaiting your action will also appear in an Action Required column on the left side of the page. You'll be notified in Up Next whenever you have unprocessed items in the Action Required column.
Everything that's happened
This feed includes everything anyone's done on the site. Every student submission, edit, etc. will appear here in reverse-chronological order. It's a good way to get a quick overview of what's going on.
You can also activate (show) and deactivate (hide) any submission here. Some activity types will have additional options here, like an edit button to make changes to a student's submission, change the author, etc.
Action Required
When something that's happened on the site requires your attention, it'll appear in the Action Required column on this page. You'll be notified in Up Next on the Home page when items are added to this column.
If you don't see the Action Required column, you're all caught up.
Examples of Action Required items:
- a student has submitted a post that requires moderation
- poll results are ready to publish
- a student has attempted an action and you need to determine the outcome
Grading
The grading page allows you to assign points and offer comments on student submissions. You can also return submissions for editing from the grading page.
Note: you probably already have a system for grading your students. You only need to use React Learning's grading functionality to the extent it supports your simulation: for example, to return submissions to students for editing, to provide realtime feedback on the site, or to convert grade points into simulation currency.
Students see grades, comments, and returned submissions on their Progress page. The Progress icon will be highlighted in purple when there's something new for them to review.
You can choose any activity from the Choose Activity drop-down at the top of the page, and view all submissions for a given activity or only those that you haven't graded.
If you want to grade everything by a certain student instead of grading all of one activity at a time, there's a link to do so on each student's Progress page.
If you'd like to use our grading tools for work completed off site, you can do so by creating an offline activity.
Grades and comments are saved automatically.
QuickGrade is a setting that removes a submission from the screen once you've graded it so you can see your progress more easily.
Return for Editing sends a submission back to the student who submitted it, along with your comments. They can view submissions returned for editing on the Progress page. When you return a submission for edits, it's automatically deactivated. You'll be notified on the Overview page when a student has edited a returned submission.
AutoActivate: if an activity is moderated, submissions won't appear on the site until you review and activate them. If you'd like, submissions can auto-activate after you've graded them. You can contact support to enable this feature. (Even with AutoActivate enabled, if you return a submission for edits, it won't auto-activate.)
Achievements
The achievements page allows you to award students achievement points and create badges that students can earn based on those achievement points.
Students can see the achievement points they've earned on their Progress page.
Badges can appear next to a student's name (or character name) whenever it appears on the site.
Creating Achievement Point Categories
To award achievement points, you need to create an achievement. Click + New Achievement on the right side of the page. From there you can name your achievement and provide a description.
The Achievement Metadata field allows us to build custom functionality around your achievements. You can ignore it unless we tell you otherwise.
Awarding Points
Click Award Points at the top of the Achievements page. You can choose a student and award them points in any of your achievement categories.
You can also edit students' current point totals using the Edit Totals link.
Badges
You can create badges that students earn based on their achievement within a certain category. For example, you could give a badge to the top three achievers in a certain category, or you could give a badge to everyone who earns more than a certain number of achievement points. Cumulative Badges count points across every achievement category.
Badges appear on student's profiles and next to their name throughout the site. You can decide whether everyone should see that a student earned a badge or just the student who earned it.
When students earn a ranked badge, the site will display their rank next to the badge. By default, ranks 1 - 3 are labeled "Gold," "Silver," and "Bronze." You can replace these labels (e.g., with "summa" and "magna") by contacting support.
Once students have earned a ranked badge, they keep it forever. If they drop in rank, their higher ranked badge will be labeled "emeritus".
Create a new badge
First, make sure you have created an achievement point category and then click the New Badge button. Then set:
Badge Name
The name that appears under the badge. This can be different than the Achievement name if you'd like.
Badge Image
The badge itself. You can upload any image. We resize it automatically.
Badge Threshold
If you set a badge threshold, every student who earns more points than the threshold will receive the badge.
Rank Count
Students can earn special ranked badges. For example, if I have the second most achievement points in a category I'll earn a silver ranked badge for that category. The rank count determines how many of the top students are ranked. Leave it blank if you don't want to award ranked badges.
Rank Threshold
If you award ranked badges (immediately above), you can set a threshold that students must meet before they earn a ranking. For example, if you set the rank threshold to 10, the top three achievers in a category will earn your badge but only if they've earned more than 10 points.
You can edit existing achievements and badges by clicking the small orange edit button next to the achievement or badge name.
Students
You can view information about all of your students here.
Click a student's name in the Student column to visit their profile.
The Persona column shows information about the student's in-game identity, including their avatar if they've created one.
The points column shows how many grade points you've awarded a student. You can click on the number of points to view that student's Progress page.
The achievements column shows how many cumulative achievement points a student as earned. You can click the plus button in this column to award a student more points, or the edit button to edit a student's category totals.
The badges column shows all of a student's badges. You can hover over any badge for more information.
The balance column shows a student's bank balance, if your simulation has currency. If your banking is set up so that students share bank accounts as a team, you can see the team balance on the Dossier instead.
Editing personas, teams, and roles in bulk
You can edit personas, teams, and roles by clicking the Edit button at the top right of the Students page.
You can also create additional personas for your students (or yourself!) here. This is useful if you want to allow students or teachers to play more than one character on the site, or if you want students to take on new characters midway through a project.
- As a teacher, only your primary persona will have teacher privileges within your simulation.
- Since a student’s achievement can affect their character (and vice versa), each persona has its own grades on the site.
Click +Team or +Role to create new teams and roles.
Click the Edit Details button below a student's name to edit their account data, avatar, or anonymity.
Changes to personas made on the Edit page are saved automatically.
Editing an individual student's account details or persona
Click Edit on the Students page, then click the Edit Details button under a student's name.
Account
You can edit a student's real name, email address, and password here. Note that this updates the student's information across all of their React Learning simulations.
Anonymous Users
Check the "Anonymous" box to hide this person's real name to everyone else on the site. You can always see an Anonymous student's real name on teacher pages like Overview, Students, and Grading. On other pages, open the ••• menu on a student's post to view their name.
Persona
This section allows you to edit a student's fictional persona within your simulation.
Name
The persona's name. When you assign a name here, student's posts to the site will be attributed to their character. You'll still see each student's real name in parentheses next to their character name so you know who's who. You can also allow students to set their own character names by creating a Character Name Activity on the Activities page.
Title
An optional title or descriptor for the character. Will be shown with a character's name. Examples include "President", "Citizen", or "Applicant". Contact support to set a default title for all of your students.
Avatar
You can set a student's avatar (profile picture) here. Generally this would be a picture of a student's character. You can also allow students to upload their own avatars by creating an Avatar Activity on the Activities page.
Team
Assign a student to a different team. You can also assign students to teams in bulk and create new teams on the Students page by clicking the Edit button.
Role
Assign a student a role to give them special capabilities. You can also assign roles in bulk and create new roles on the Students page by clicking the Edit button.
Activities
The activities page is where you'll build and control your simulation. You create activities for students here, open and close them, and arrange them into stages to help orchestrate your simulation.
Click the + New Activity button to create a new activity.
Click any activity's Edit button to change its name, description, or settings.
Click the Open/Closed switch next to any activity to toggle its availability to students.
Copying Activities
To copy an activity, click Edit then Copy. You can copy activities within or across simulations.
Polls with generated (student, team, or activity content) ballots can't be copied.
If you copy an activity to another simulation and its "Who can submit?" setting is limited to a certain role or team, the site will try to find matching roles and/or teams in the destination simulation. If none exist, you'll be prompted to create those roles and teams in the destination simulation.
The site will also try to match activities to pages that exist on both sites and notify you if there is no match.
Stages
Stages allow you to bundle activities and toggle them all on and off together. You can plan your project by dragging stages around and dragging activities between them. Orchestrate each phase of the simulation by toggling stages on and off.
Stages are purely an organizational tool; they are not visible to your students.
Create Stages
Click the New Stage button on the Activities page to create a new stage. Give the Stage a name and, optionally, a description. Again, stage names and descriptions aren't visible to your students.
Add Activities
To add an activity to a stage, simply click and drag it to that Stage.
You can also create a new activity within a Stage by clicking that stage's New Activity button.
Finally, you can add an activity to a new or existing stage from that activity's settings page.
Organize your Simulation
Drag stages around to reorder them.
Archive completed stages
When you're done using a stage, you can drag it to the "Archived" section of the activities page. This will automatically close the stage and expose shortcuts to grade each activity within the stage. Archived stages stay out of your way and won't accept new submissions. Existing submissions aren't affected.
Me
Most of the time you and your students spend on React Learning, you'll be interacting with your simulated world. The Me menu contains functionality pertaining to the real world.
Progress
The Progress page is focused on the requirements of your real classroom.
Students can view feedback in the form of comments and grades, check for missing activity submissions, and see how many achievement points they've earned in each category.
When you return submissions to students for editing (see Grading below) they get a notification here, along with your comments and a link to edit the submission.
Teachers can access any student's Progress page on the Students page by clicking on their current score in the Points column, or by visiting the student's profile and clicking "Progress".
You can customize students' progress page with term or project dates, progressive grade scales, and more. To take advantage of these options, contact support.
If you'd like grades and feedback earned off the platform to be included on the progress page, you can create a new offline activity on the activities page and enter grades for the offsite work.
Simulations
You can switch between (and edit) all of your simulations here.
If you have multiple personas, you can also switch between personas on the Simulations page.